What To Prepare Before Installing An LED Business Sign
A smooth LED business sign installation does not start on installation day.
It starts earlier - with the right wall photo, sign placement, power access, measurements, mounting surface, and project timeline.
Many business owners focus on the final look of the sign, but the installation environment matters just as much. A beautiful sign can still face delays if the wall is not ready, the power source is unclear, the placement is not approved, or the installation access is limited.
This guide explains what to prepare before installing an LED business sign, so your project can move from approved design to finished space with fewer surprises.
This article is for general planning only. Installation requirements can vary by sign type, wall condition, electrical setup, location, and local rules. For complex, outdoor, or hardwired signs, work with qualified professionals when needed.
Quick Answer: What Should You Prepare Before Installing An LED Business Sign?
Before installing an LED business sign, prepare:
- A clear wall or storefront photo
- The final sign location
- Approximate wall measurements
- Power source information
- Wall surface details
- Mounting access
- Installation height
- Business hours or access time
- Landlord or property approval, if needed
- Your preferred installation timeline
The more context you provide before production, the easier it is to plan the cleanest installation method.
Why Installation Planning Matters
An LED sign is not just a logo with lights.
It is a physical object that needs to fit the space, connect cleanly with the wall, and work with the surrounding environment.
Installation planning helps answer important questions:
- Will the sign look balanced on the wall?
- Can the wiring be hidden or managed cleanly?
- Is the wall strong enough for the sign?
- Is the power source close enough?
- Will the sign be installed indoors or outdoors?
- Is the installation area easy to access?
- Does the building or landlord need to approve the placement?
When these questions are answered early, the final result usually looks cleaner and more intentional.
1. Send A Clear Wall Or Storefront Photo
A wall photo is one of the most useful things you can send before installation.
It helps the sign team understand the real space, not just the logo file.
A good photo should show:
- The full wall or storefront
- The area where the sign will go
- Doors, windows, furniture, counters, shelves, or fixtures nearby
- Existing lighting
- Wall texture
- Nearby power outlets, if visible
- Ceiling height or mounting limitations
If possible, send both a wide photo and a close-up photo.
The wide photo helps with scale and placement. The close-up helps with wall texture and mounting conditions.
A sign should not be planned in isolation. It should be planned inside the space where it will actually live.

2. Confirm The Final Sign Placement
Before installation, the sign location should be clear.
Not “somewhere on this wall.”
Not “centered-ish.”
Not “we’ll decide later.”
The placement should be planned based on visibility, balance, customer movement, furniture, lighting, and viewing distance.
For indoor signs, consider:
- Reception desk location
- Customer entry path
- Seating area
- Photo-taking angle
- Eye-level visibility
- Wall symmetry
- Background color and texture
For storefront or outdoor signs, consider:
- Street visibility
- Parking lot view
- Door and window placement
- Neighboring signs
- Building lines
- Awning or facade structure
- Nighttime visibility
The best sign placement is not always the largest empty space. It is the place where the sign can do its job clearly.
3. Measure The Wall Area
You do not need perfect architectural drawings for every project, but basic measurements help a lot.
Before installation, try to provide:
- Wall width
- Wall height
- Approximate sign area
- Distance from ceiling
- Distance from floor
- Distance from nearby doors or windows
- Preferred sign width, if you have one
Measurements help prevent signs from feeling too small, too large, too high, or too low once installed.
For LED signs, scale matters because light changes the visual weight of the sign. A glowing sign can feel stronger than a non-illuminated sign of the same size.
That is why mockups and wall context are important before production begins.
4. Check The Power Source
LED signs need power.
Before installation, identify where the nearest power source is and whether the wiring should be visible or hidden.
Important questions include:
- Is there an outlet near the sign location?
- Will the sign be plugged in or hardwired?
- Can wiring be hidden behind the wall?
- Is the power source above, below, or beside the sign?
- Will an electrician be needed?
- Are there building rules for electrical work?
- Will the sign be used indoors or outdoors?
For many business owners, this is the detail that gets overlooked until the last minute.
A sign can look perfect in a mockup, but if the power plan is unclear, the final installation may look less clean than expected.
The goal is not only to make the sign light up.
The goal is to make the lighting feel integrated into the space.

5. Understand The Wall Surface
Not every wall behaves the same.
A sign installed on drywall may need a different mounting approach than a sign installed on brick, concrete, tile, glass, metal, wood slats, or textured surfaces.
Before installation, share what the wall is made of if you know.
Common wall surfaces include:
- Drywall
- Brick
- Concrete
- Stucco
- Tile
- Glass
- Wood
- Metal panels
- Textured or uneven surfaces
Wall surface affects mounting, spacing, hardware, stability, and how the light appears behind or around the sign.
For backlit signs, the wall surface can also affect the glow. A smooth wall may create a cleaner halo effect, while a textured wall may create a more uneven light pattern.
This does not mean textured walls cannot work. It simply means they should be planned for.
6. Think About Installation Access
Installation access is easy to forget.
Before installation day, check whether the team can safely and easily reach the sign area.
Consider:
- Ceiling height
- Ladder or lift access
- Narrow hallways
- Stairs
- Elevators
- Parking access
- Loading area
- Business operating hours
- Furniture that may need to be moved
- Customer traffic during installation
- Building access rules
For outdoor signs, access may be even more important because height, weather, parking, sidewalk space, and building restrictions can affect the installation plan.
If your space has limited access, share that information early.
It is better to plan around it before installation day than to discover it when the sign arrives.
7. Confirm Approvals Before Installation
If you lease your space, confirm whether anyone else needs to approve the sign before installation.
This may include:
- Landlord
- Property manager
- Shopping plaza management
- Building owner
- Franchise team
- City or local authority
- Internal leadership team
Approval may involve sign size, placement, lighting, color, installation method, operating hours, or electrical work.
This is especially important for outdoor signs and storefront signs.
A sign should not be produced based on an assumption if the property has strict rules.
Getting approval early can help avoid redesign, rescheduling, or extra costs later.
8. Share Your Timeline Early
If your sign is tied to a grand opening, renovation, campaign launch, event, or inspection date, share the timeline from the beginning.
Installation timing may depend on:
- Final design approval
- Production schedule
- Quality check
- Shipping
- Site access
- Electrical readiness
- Landlord approval
- Permit review, if applicable
- Installer availability
A realistic timeline helps everyone plan better.
If the opening date is fixed, the sign plan should work backward from that date.
The earlier the timeline is shared, the easier it is to avoid last-minute pressure.
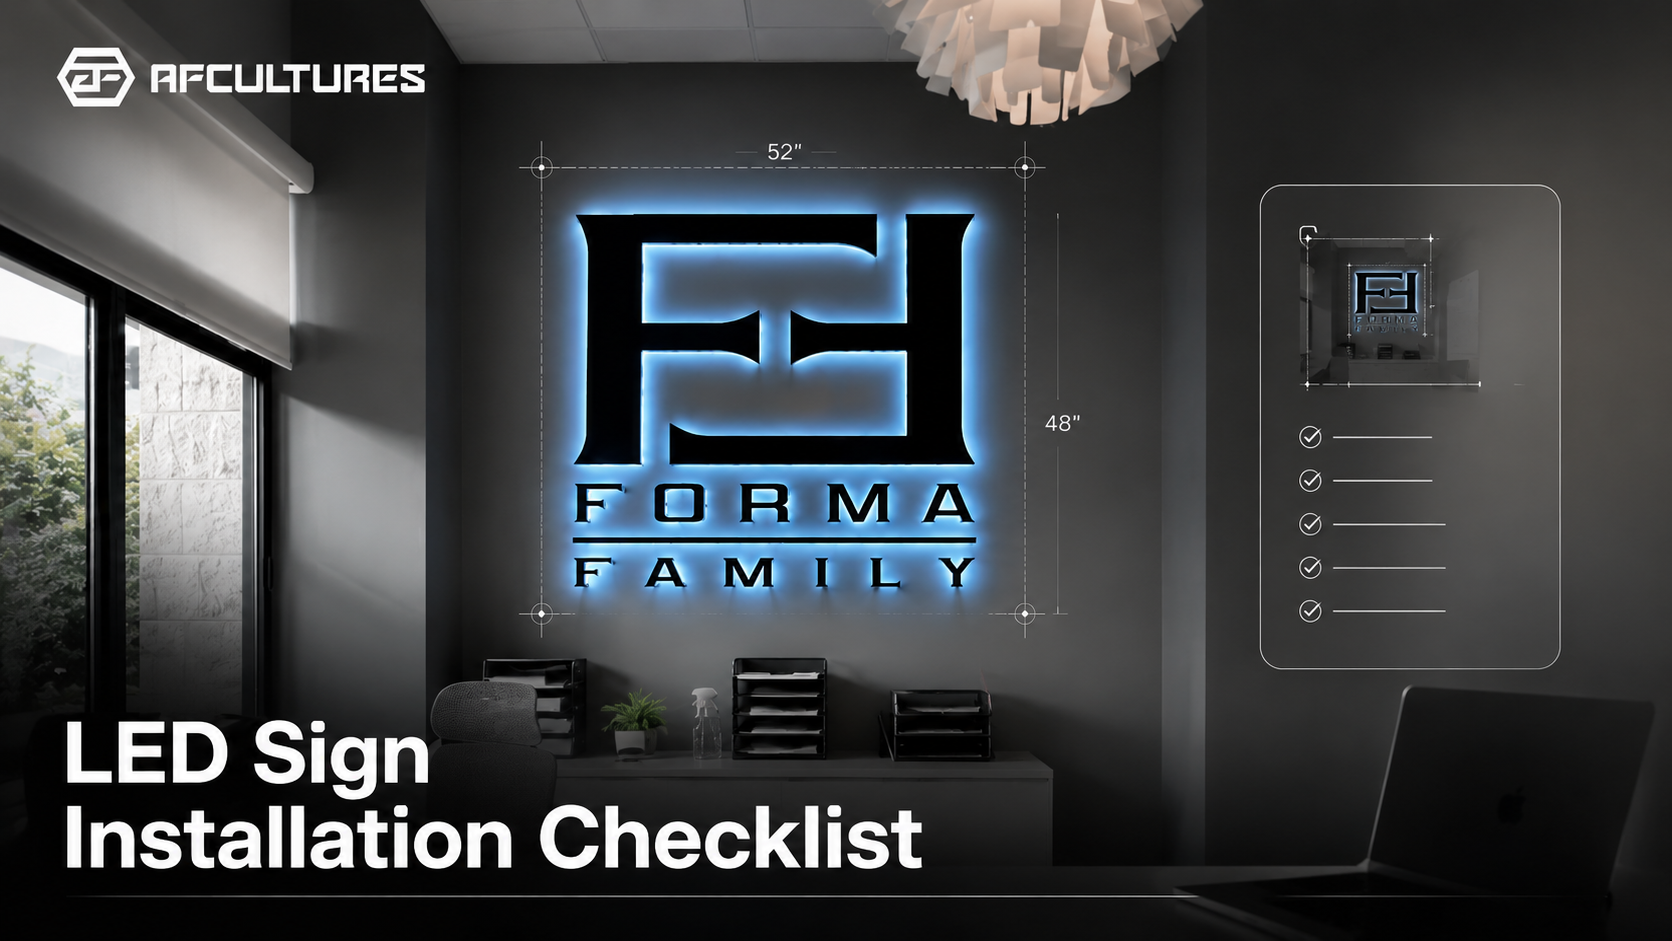
Installation Readiness Checklist
Before your LED business sign is installed, prepare this checklist:
| Checklist Item | Why It Matters |
|---|---|
| Logo file approved | Keeps production aligned with the final brand version |
| Wall or storefront photo | Helps plan scale, placement, and mounting |
| Wall measurements | Reduces sizing and proportion mistakes |
| Final sign location | Prevents last-minute placement changes |
| Power source checked | Helps plan wiring and lighting cleanly |
| Wall surface identified | Supports safer and cleaner mounting |
| Access details shared | Helps avoid installation-day delays |
| Approval confirmed | Reduces risk from landlord, property, or city rules |
| Timeline shared | Helps coordinate production, shipping, and installation |
A clean installation is usually the result of clean preparation.
What AFCULTURES Helps You Think Through
At AFCULTURES, the goal is not only to build a sign that looks good in photos.
The goal is to help business owners bring the sign into a real space with fewer unknowns.
That means thinking through:
- The logo
- The wall
- The material
- The lighting
- The sign depth
- The viewing angle
- The power plan
- The installation method
- The project timeline
- The final business environment
For many projects, the most valuable step is not production itself.
It is the planning before production.
When the wall photo, mockup, measurements, lighting direction, and installation context are clear, the final sign has a much better chance of feeling intentional in the space.
Final Thought: Your Sign Should Fit The Real Space
An LED business sign should not feel like a separate object added to a wall.
It should feel like it belongs there.
That only happens when the sign is planned around the real installation environment.
Before your LED sign is produced or installed, prepare the basics:
Send your logo, wall photo, preferred placement, project location, power source details, and timeline.
AFCULTURES can help you understand what needs to be checked before installation, so your sign can move from mockup to finished space with more clarity.
Frequently Asked Questions
What should I send before installing an LED business sign?
Send your logo file, wall or storefront photo, preferred placement, approximate wall measurements, power source information, wall surface details, project location, and desired timeline.
Do LED business signs need a power source?
Yes. LED signs need power. Depending on the sign type and location, the sign may be plugged in or may require a more planned electrical setup. For complex or hardwired signs, work with qualified professionals.
Can an LED sign be installed on any wall?
Not always. Wall material, texture, strength, size, and access can affect installation. Drywall, brick, concrete, glass, tile, wood, and metal surfaces may require different mounting methods.
How do I know where to place my LED sign?
Choose placement based on visibility, customer movement, wall balance, viewing distance, lighting, furniture, and the purpose of the sign. A mockup can help you preview placement before production.
Should wiring be planned before production?
Yes. Wiring and power access should be considered early, especially for illuminated signs. A clean power plan helps avoid visible cables, awkward placement, or installation delays.
Do outdoor LED signs need approval before installation?
They may. Outdoor signs can involve landlord approval, property rules, city requirements, permit considerations, lighting restrictions, and installation access. Check requirements before production.